We are always happy to answer any questions you may have.
Call us on 1300 848 302
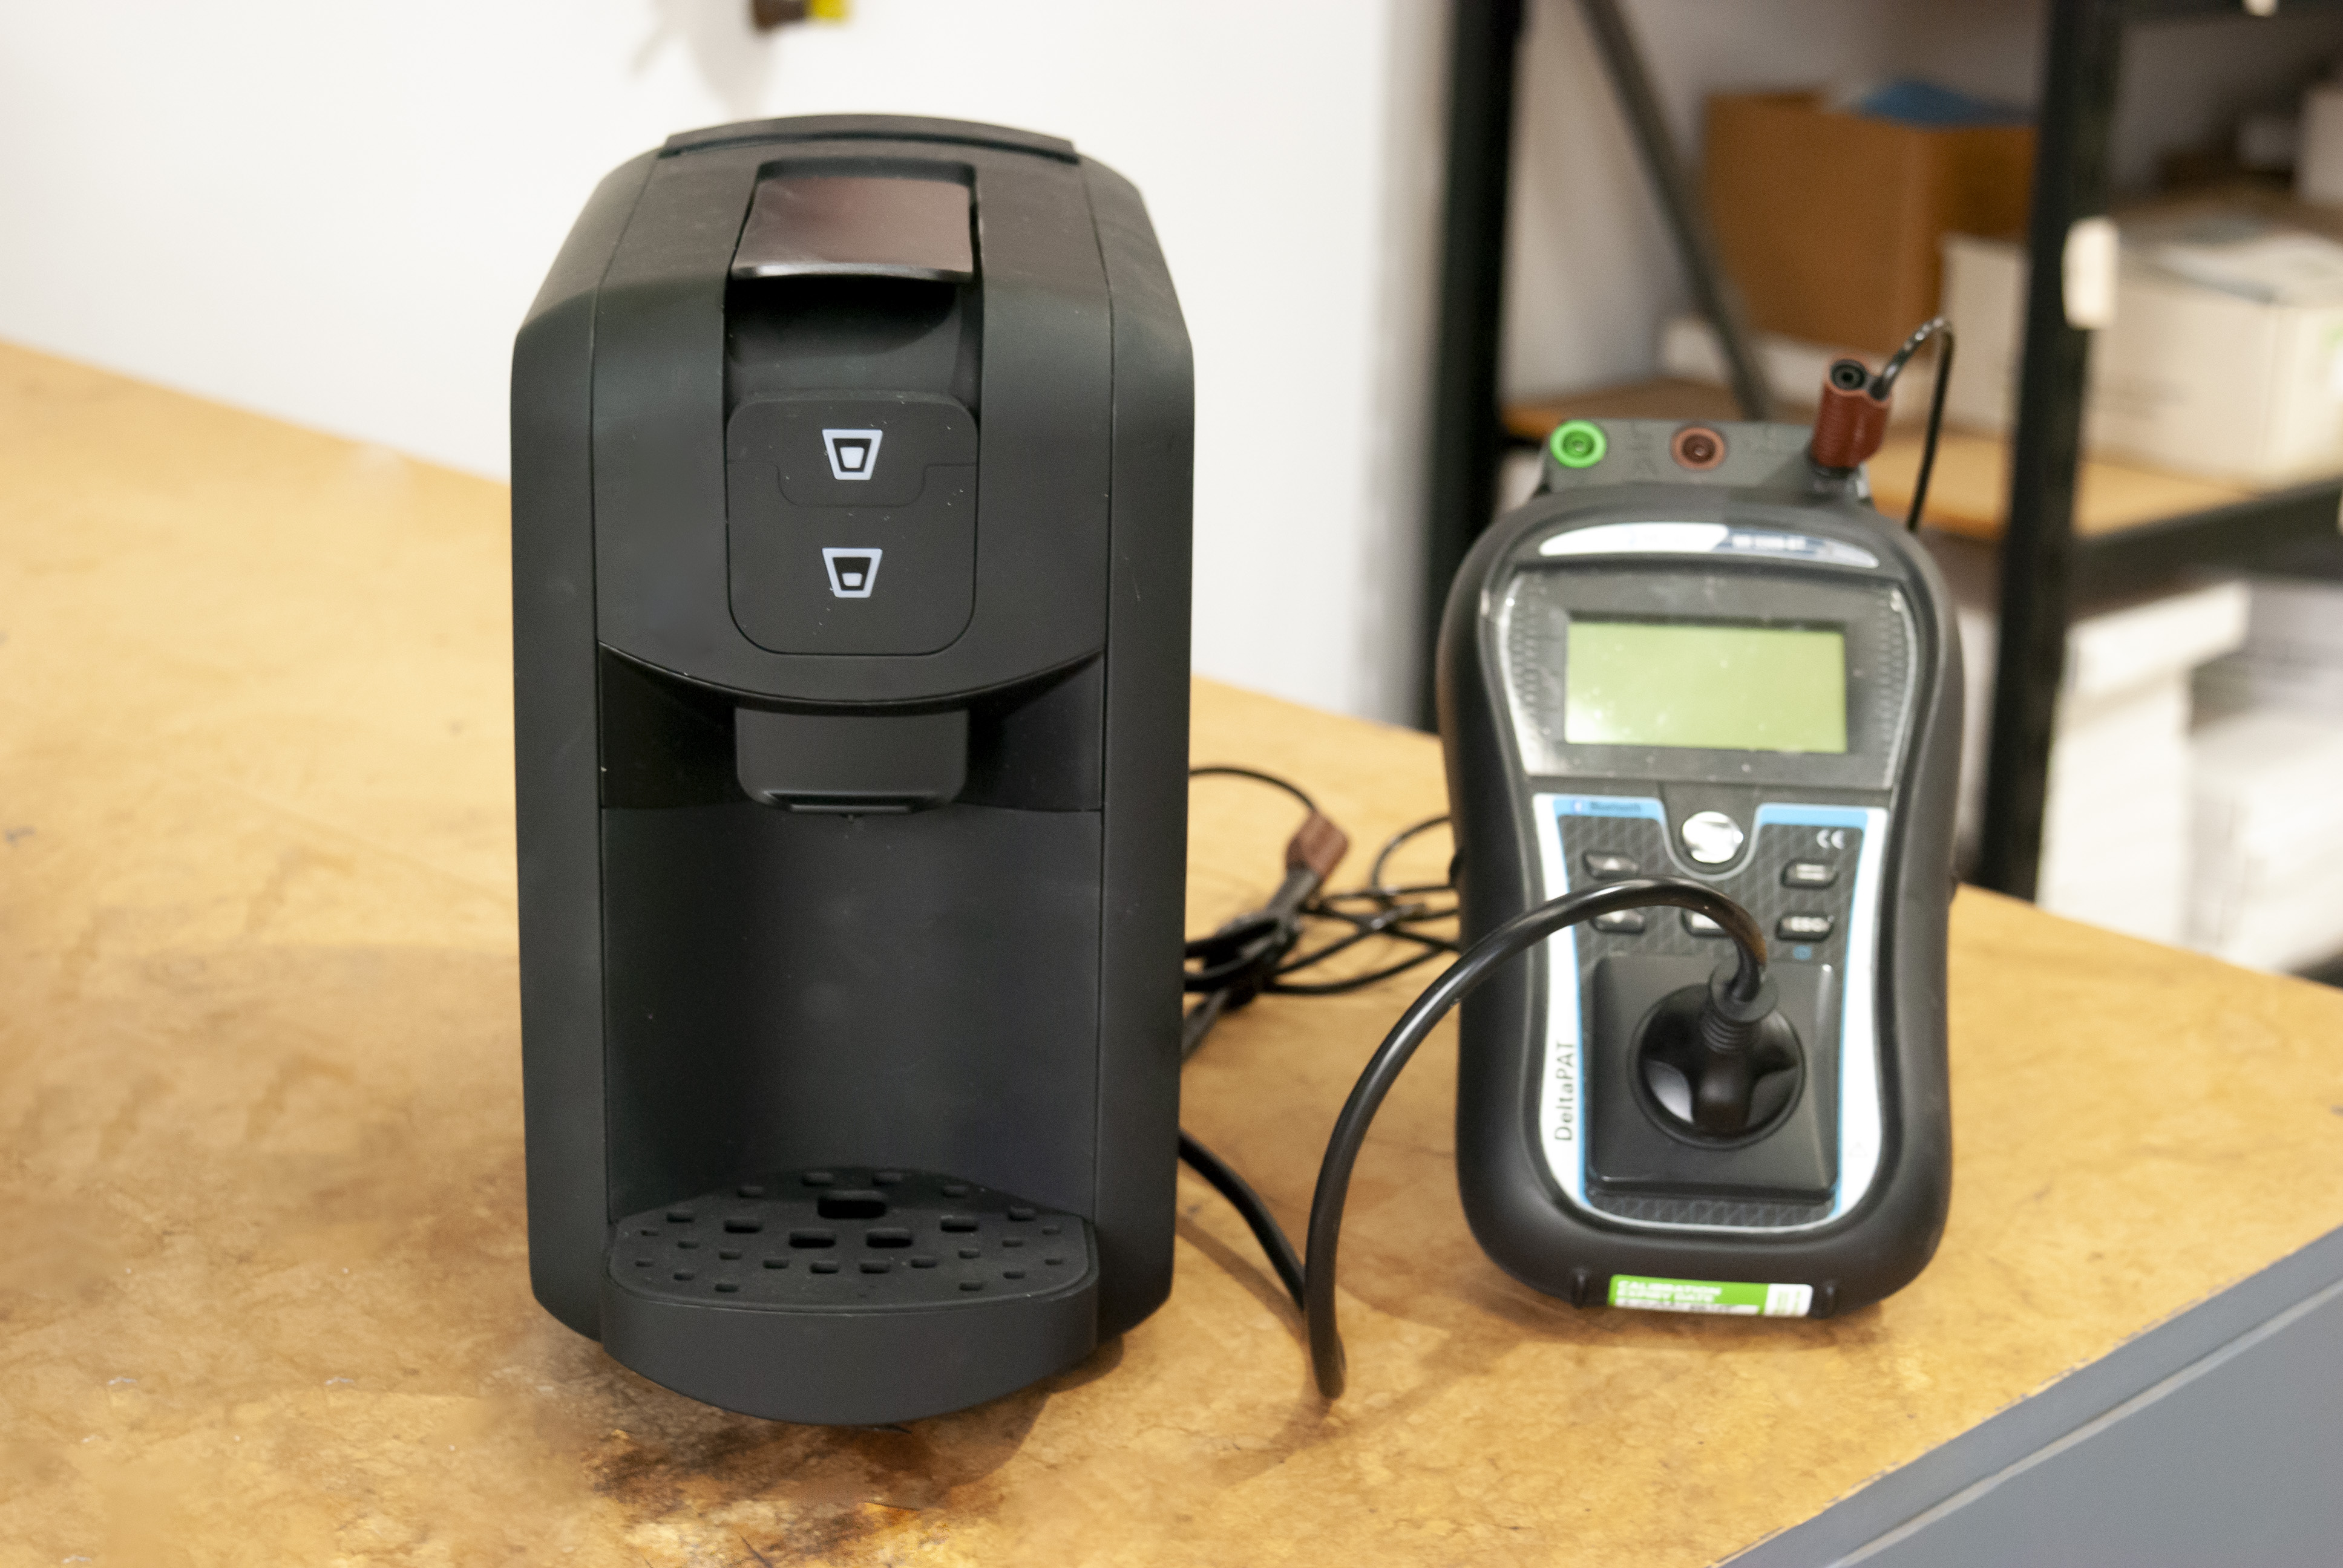
Pod Coffee machine connected to a Delta PAT Tester
We often get asked a variety of questions about testing different electrical appliances, but questions relating to a coffee machine is probably increasing more than any other item. This is not surprising considering how many offices and workplaces now have coffee machines present. And though the process is mainly straightforward, not all coffee machines are that simple. A case in point is the Nespresso and Aldi pod machines, which can be tricky to test, as the earthing point is often hidden under layers of plastic. Looks take a closer look at how we test this item properly.
Typically, with Class 1 equipment you'd perform an Earth Continuity Test. But with the earthing point concealed, that's not an option. So the workaround is to conduct a Class I Leakage Test as most tests will fail trying to find the earth bond during a Class I Test. Testing a pod coffee machine is similar to testing a vacuum cleaner because both are encapsulated earth appliances. Hence, the preferred option is the leakage current test which offers a higher chance of detecting a fault.
Conducting Leakage Testing:
Leakage testing matters significantly because it serves as an important safety measure. Electric shock is a serious safety concern, especially in environments where electrical appliances are used daily. Even small amounts of leakage can pose a risk of electric shock to users. By conducting leakage tests, you can quickly identify if any current is escaping from the appliance and address potential hazards before they escalate.
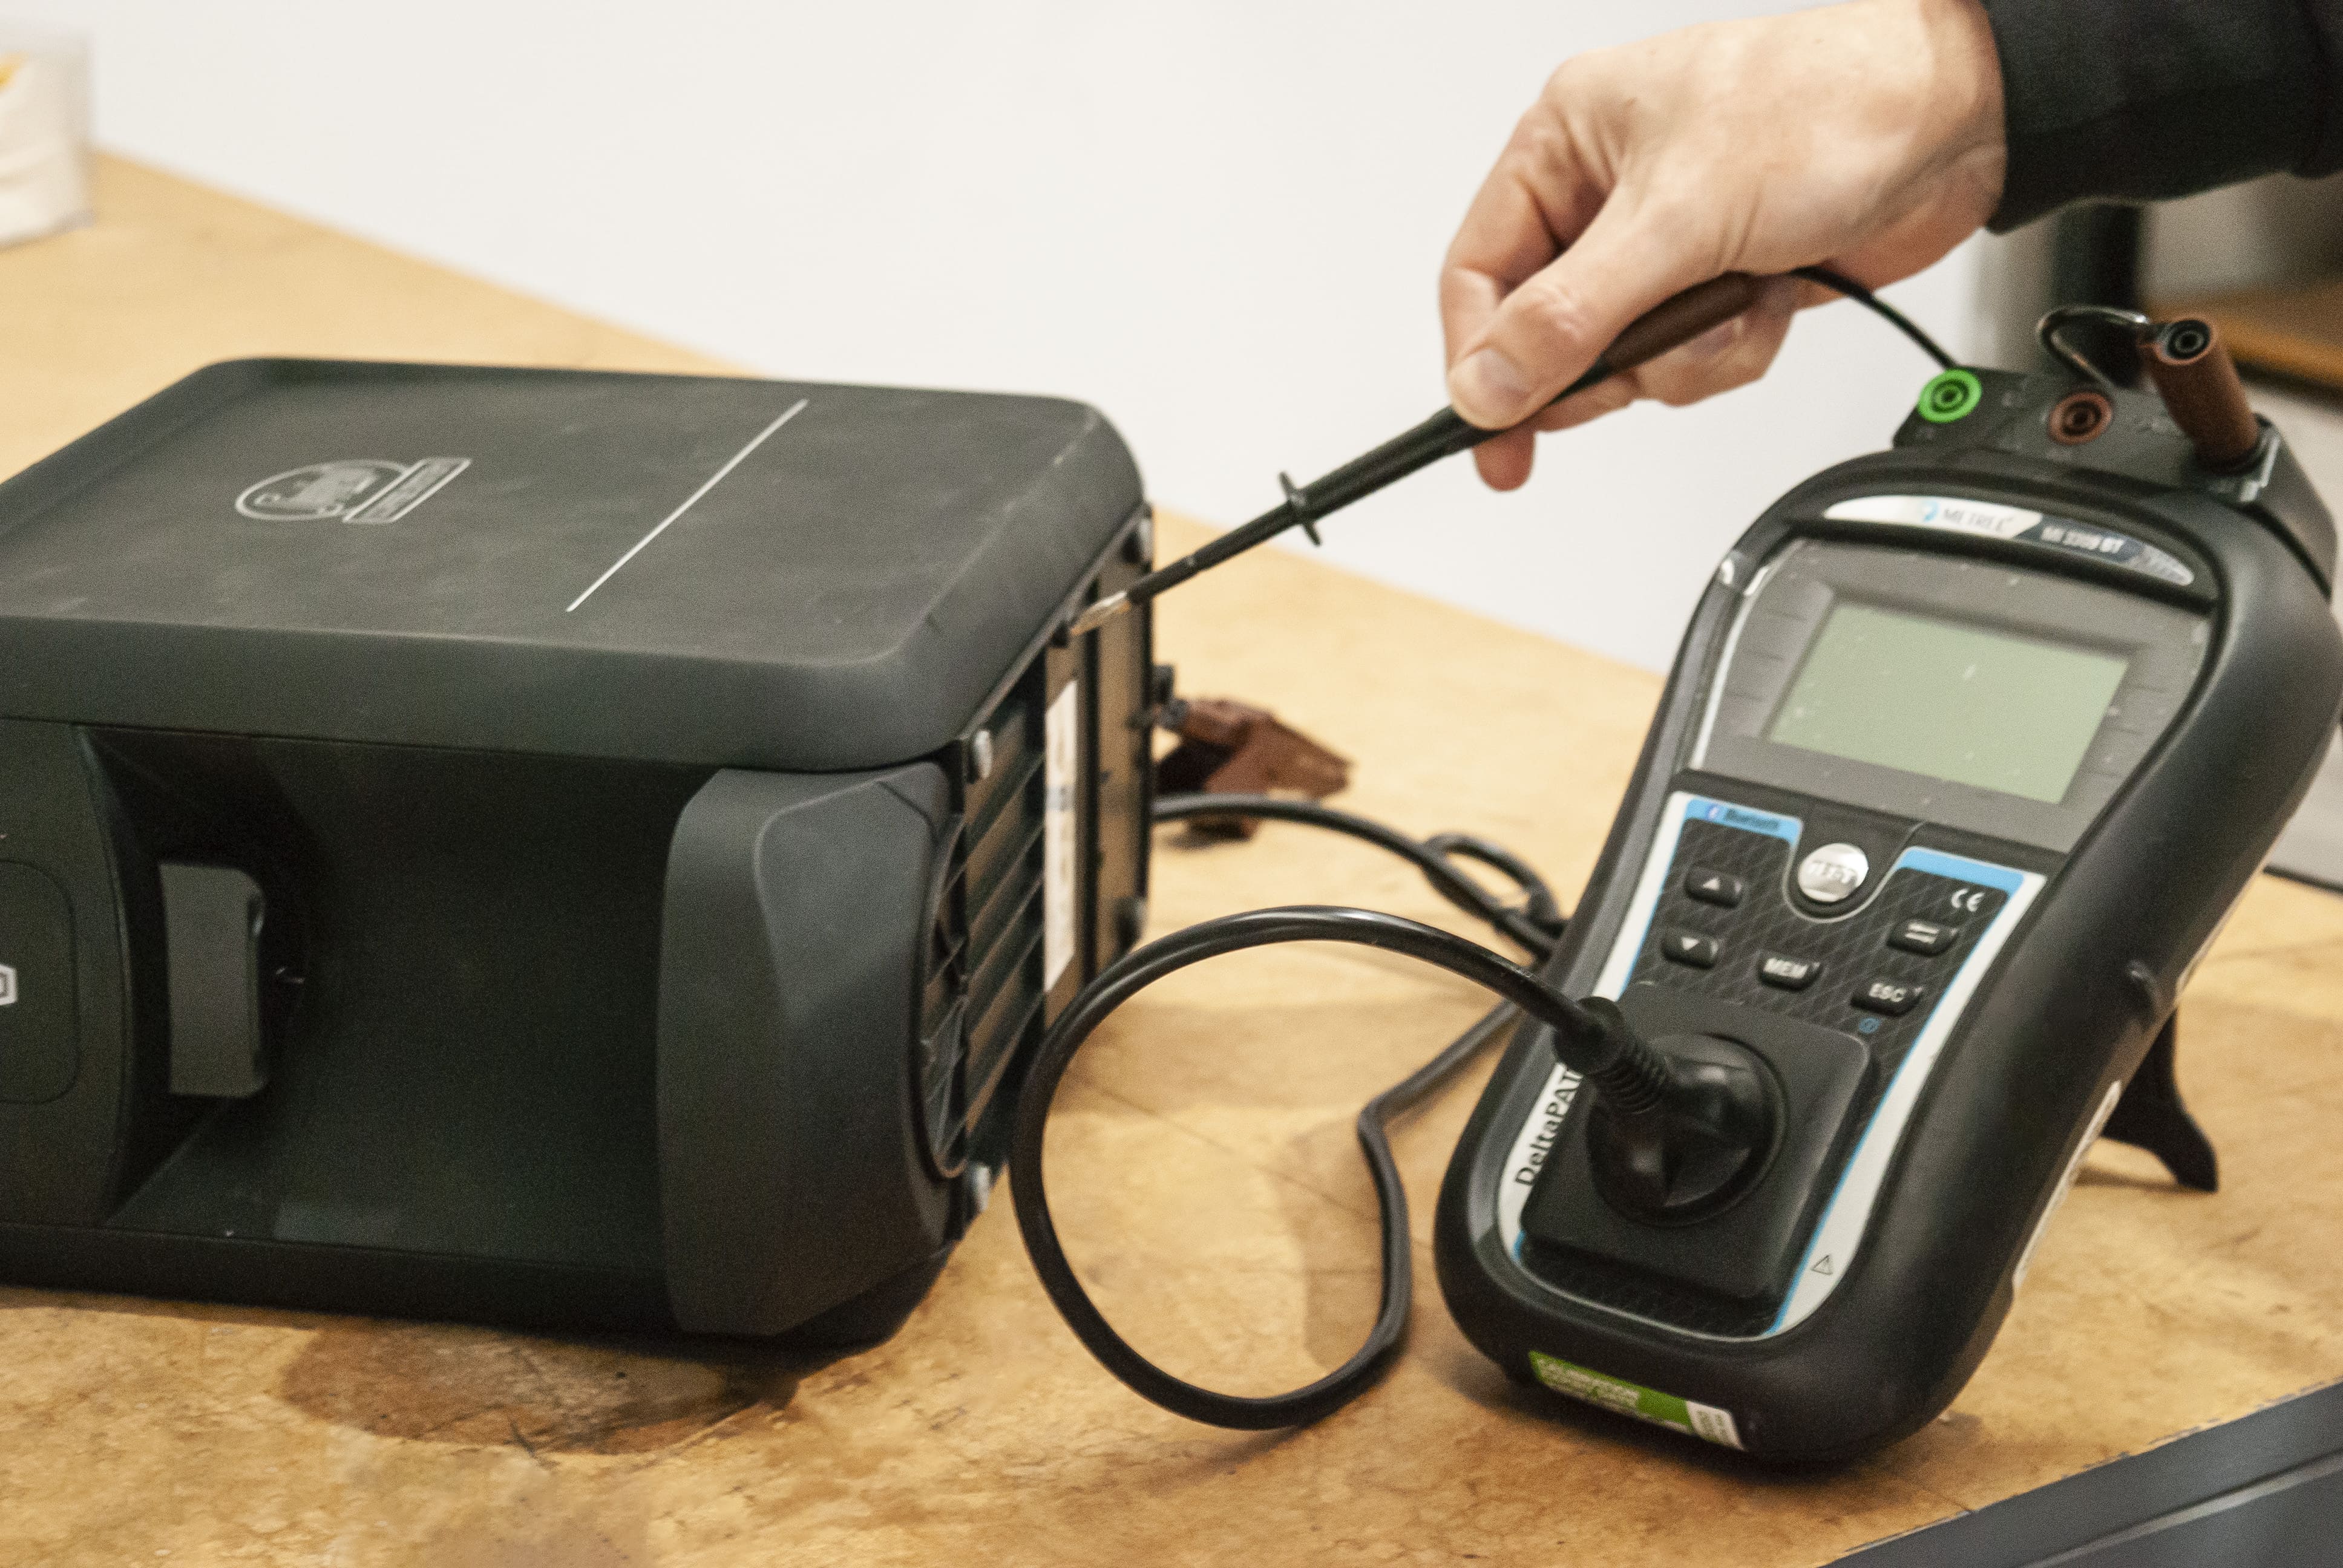
Conducting a Class 2 Leakage Test on an encapsulated Coffee machine
The Testing Process:
Now let's look at the testing process itself. Before you start testing any electrical appliance, the first step always is to conduct a thorough visual inspection to check for any visible damage, loose connections, or signs of wear. Next, if the earthing point is inaccessible, perform a Class II Leakage Test following these steps:
Once testing is complete, don't forget to tag the appliance. Attach a durable test tag indicating the test date and the name of the tester. Proper tagging serves as a visual indicator that the appliance has been tested and deemed safe for use.
Regardless with the type of environments you're testing and tagging, knowing and understand how to test and tag a coffee machine is vital considering how common they are. By understanding the importance of leakage testing, conducting thorough inspections, and following proper testing procedures, you can ensure the safety of yourself and all the others. If you have any doubts or need assistance, feel free to contact us at 1300 848 302. Our team is here to help!